Adobe Photoshop online Classes

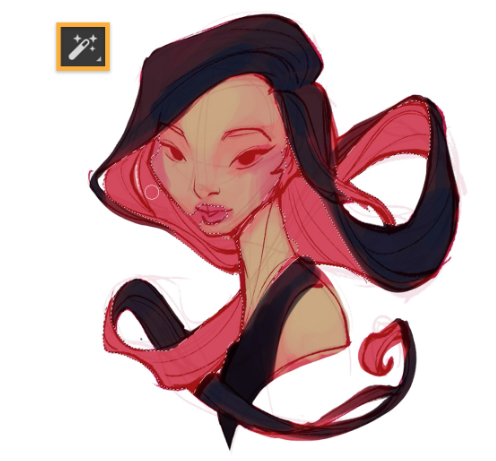
Start with a rough sketch than create using a pressure-sensitive stylus and tablet and paints over it. Selects a color and chooses a rough brush to create an outline of the face and neck. Alternate brush sizes to create different width strokes — broader strokes for the face, thinner ones for the finer details of the hair.
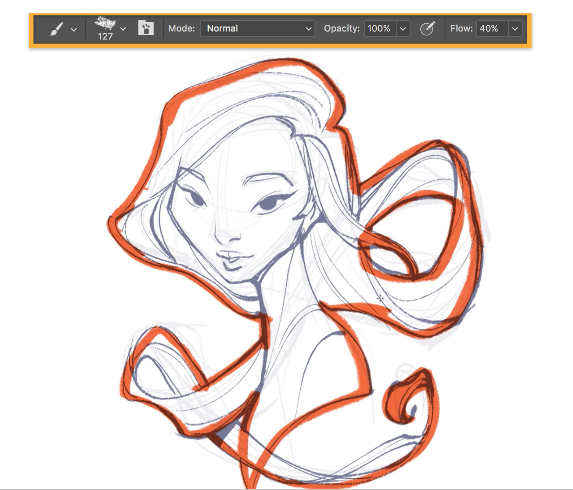
then prepare to apply the first pass of color. In this multistep process, group the two outline layers and creates a new layer. Then, use a custom oil pastel from the Tool Presets and trace the outer edges of the sketch.
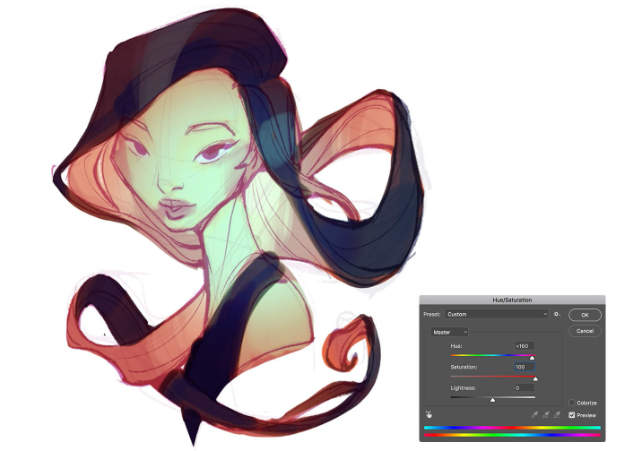
perfect the colors through intuition and experimentation. start by choosing colors, then plays with sliders to tweak the Hue/Saturation/Lightness and Selective Color.
periodically duplicate a layer and work on a new one to track the progress of the drawing. The previous layer shows the image at an earlier stage and allows to make sure the project is progressing.
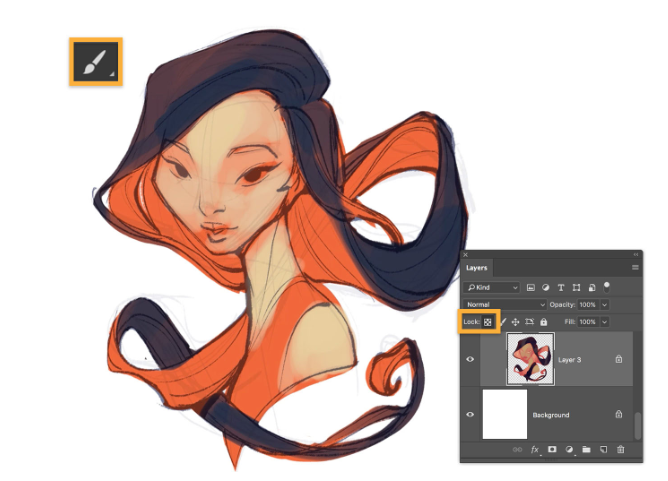
applie the key colors without focusing on blending just yet. fill the hair and clothing with orange, then fill the areas of skin with a pale peach using a soft round brush. use Replace Color to modify the Fuzziness and Saturation of the peach to define the highlights on the face. Then, highlight the hair with blue and locks the transparent pixels on the top layer to change the color of the faded edges of the hair without “spilling” the color onto the rest of the canvas.
In the final step to distinguish the parts of the picture, change the color of her brush and give depth to the cheeks and color to the lips. use the Magic Wand tool to select the pink color of hair surrounding the face and then applie a paler peach color to that area using a brush set with low opacity so the strokes overlay each other. Then, block the clothing with a darker color using a wide, soft brush.
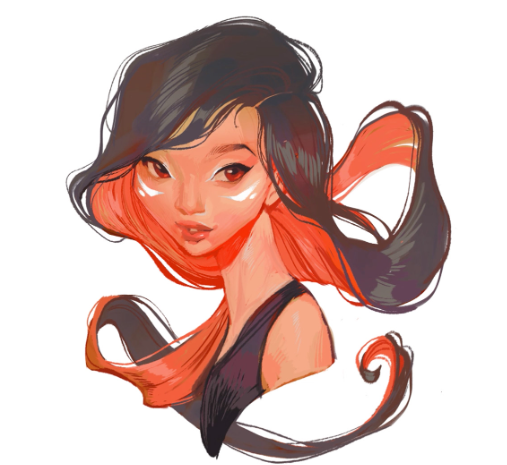
At this point, do a lot of brushwork to finesse the details. Rather than using shadows and highlights, use different colors to give dimension to the hair, skin, and eyes.